


Kids Cruiser Bike with Training Wheels: Fit & Setup Tips
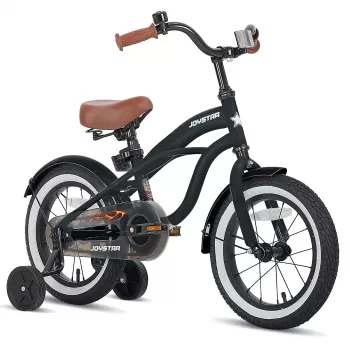
Kids Cruiser Bike with Training Wheels: Comfort, Confidence, and Safer First Rides
A cruiser-style kids bike with training wheels is built for relaxed, steady neighborhood riding—upright posture, comfortable grips, and a stable feel that helps new riders practice starts, stops, and turns. The goal isn’t speed; it’s confidence. With the right fit, a careful training wheel setup, and simple safety habits, many kids learn the basics faster and enjoy rides longer.
What Makes a Cruiser Bike Great for New Riders
Cruiser bikes tend to feel friendly from the first push-off. The geometry is designed for steadiness, and the upright position makes it easier for kids to look ahead instead of down at the front wheel.
- Upright riding position: Better visibility and less strain on wrists and shoulders during longer rides.
- Wider, comfortable saddle: Helps kids stay seated and balanced while learning a smooth pedal rhythm.
- Stability-first geometry: More straight-line confidence and calmer steering than aggressive, speed-focused bikes.
- Training wheels add a “lean limit”: Fewer tip-overs during starts, stops, and slow turns.
- Best places to practice: Sidewalks, smooth pavement, park paths, and quiet residential streets.
Fit and Sizing: Getting the Right Feel from Day One
The quickest way to make a bike feel “too big” is poor fit. Ignore age labels when possible and focus on wheel size and inseam. A bike that’s easy to start and stop on builds momentum in learning.
- Standover comfort first: When standing over the top tube, there should be comfortable clearance so the bike feels manageable.
- Check handlebar reach: When seated, shoulders relaxed and elbows slightly bent—overreaching reduces low-speed control.
- Seat height baseline: With training wheels installed, a slightly lower seat can boost early confidence; raise it gradually as balance improves.
- Wheel size beats age range: Compare wheel size and inseam for a better match than “age range” alone.
- If between sizes: Choose the size that makes starts and safe stops easiest; confidence accelerates skill-building.
Quick Fit Checks Before the First Ride
| Fit Check | What to Look For | Why It Matters |
|---|---|---|
| Standover clearance | Comfortable space between child and top tube | Reduces fear and improves quick dismounts |
| Handlebar reach | Relaxed shoulders; slight elbow bend | Improves steering control |
| Brake access | Fingers can squeeze levers without shifting grip | Shortens stopping time |
| Seat comfort and height | Stable seated posture; feet can touch down if needed | Builds confidence during starts and stops |
Training Wheels Setup: Stability Without Teaching Bad Habits
Training wheels should prevent falls without turning every turn into a hard “tilt” onto one wheel. A good setup feels predictable and encourages gradual balance development.
- Start even: Set both training wheels evenly so the bike sits nearly upright; avoid one wheel much higher than the other.
- Lift in small steps: Over time, raise training wheels slightly (a small gap) to encourage balance while still preventing full tip-overs.
- Re-tighten early and often: Check and tighten mounting hardware before every early ride; first-week vibrations can loosen bolts.
- Choose smooth practice zones: Flat pavement helps kids learn pedaling and braking without fighting bumps.
- Transition gradually: When a child rides straight and can start/stop confidently, lift the wheels in small increments rather than removing them suddenly.
Safety Essentials for Neighborhood Cruising
Comfort helps kids ride longer, but safety habits help them ride smarter. Focus on simple, repeatable routines that make sense to a beginner.
- Helmet fit: Level on the head, snug, and low on the forehead; straps form a “V” under the ears and the buckle stays secure.
- Visibility: Bright clothing and reflectors help in shaded areas and near driveways; a bell is helpful on shared paths.
- Braking practice: Teach “slow squeeze” instead of grabbing; rehearse stopping at imaginary lines.
- Footwear: Closed-toe shoes with good grip; avoid long laces that can catch the chain or crank.
- Route choice: Practice away from traffic, driveways, and steep slopes until stopping is consistent.
For additional guidance on safe riding and helmets, reference the CPSC bicycle safety resources and the CDC helmet safety guidance.
Comfort and Practical Features Parents Appreciate
Small design details can dramatically change how often a kid asks to ride again. A cruiser bike’s comfort-forward setup is especially useful during the first few weeks, when short practice rides turn into longer neighborhood loops.
Care, Checks, and First-Week Tune-Up Routine
Shop In-Stock Picks
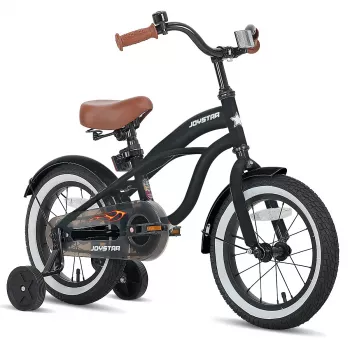
- Kids Cruiser Bike with Training Wheels — a comfort-first option designed for steady, confidence-building neighborhood rides.
- AI Tools for Professional Editing Guide – Complete Digital Download — useful for creating polished printable checklists, progress charts, or a family riding rules sheet you can keep consistent.
A Solid Option for Easygoing Rides
FAQ
What age is a cruiser bike with training wheels best for?
Age can be a rough starting point, but height, inseam, and wheel size are more reliable. Many beginners are in early elementary years, yet the best match is the bike that allows comfortable standover clearance and easy, confident stops.
How tight should training wheels be, and should they touch the ground evenly?
Start with both training wheels set evenly so the bike sits close to upright, then tighten all mounting hardware firmly and re-check frequently. As skills improve, lift both wheels slightly in tiny increments so your child can practice balance without sudden tip-overs.
When should training wheels come off?
Remove them when your child can ride straight, start smoothly, stop confidently, and steer around small obstacles without panic. A gentle transition works best: raise the wheels gradually and add short, flat-ground practice sessions without them.













Leave a comment